HDMI output on FPGA platforms is a powerful way to generate real-time graphics directly from custom hardware. In this article, we’ll explore how to implement HDMI output using the LiteX framework on the Tang Nano 9K, a low-cost FPGA with impressive versatility. I’ve already written a guide on how to get started with LiteX and build a basic SoC in the previous post.
🧱 HDMI Architecture in LiteX
By default, the tangnano9k.py file in LiteX includes an HDMI output module that displays a test pattern with vertical color bars. This can be enabled using the --with-video-terminal flag during SoC build.
There is also an optional (commented-out) function that redirects UART output to HDMI, displaying a terminal. However, both features consume a significant number of logic resources. In this article, we focus on building more practical and efficient custom graphics modules.
Key Components
To generate custom graphics, the HDMI output architecture in LiteX is structured as follows:
VideoTimingGenerator: generates horizontal (hsync), vertical (vsync) sync signals and display enable (de).VideoPattern(custom module): produces RGB values per pixel based on its position. 1VideoGowinHDMIPHY: physical HDMI PHY module for digital video output.
🖼️ Drawing Graphics
LiteX allows the definition of hardware-based video modules. Here are several I’ve implemented:
🧱 TilemapRenderer: Retro-Style Tile-Based Rendering
This module renders a grid of tiles (e.g., 16×16 pixels):
- Uses a ROM to store the pixel data of each tile.
- A
tilemapselects which tile to display at each screen cell. - Calculates memory addresses for each pixel.
- Fetches RGB from separate memory blocks.
Perfect for building environments like Zelda, Pokémon, etc.

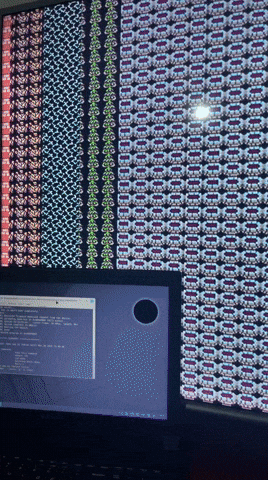
🔵 BarsRenderer: Displaying Tiles as Vertical Stripes
Ideal for visually testing a tileset without needing a tilemap.
- Splits the screen horizontally.
- Each stripe displays a different tile.
- The tile pattern repeats vertically within the stripe.
Key code snippet:
bar_idx = Signal(max=stripes_count)
expr = 0
for i in range(1, stripes_count):
    expr = Mux(h >= i * stripe_width, i, expr)
self.comb += bar_idx.eq(expr)
This chained Mux determines which tile to show based on hcount.
📌 Useful for:
- Visually verifying tile ROM data.
- Creating demo scene-style effects.
- Efficient rendering without FSM.

⚙️ BarsC: Software-Controlled Stripes
An extended version of BarsRenderer that lets you move stripes horizontally via CPU-controlled CSRs (CSRStorage):
- Each stripe has its own register for start position.
- Modifiable in real-time via UART, console, or C code.
- Great for dynamic interfaces or interactive effects.
🚀 MovingSpritePatternFromFile: Animated Sprite
This module renders a bouncing sprite loaded from a .mem file:
- Updates position every
vsync. - Detects screen border collisions.
- Checks if the current pixel is inside the sprite:
self.comb += sprite_visible.eq(
    (hcount >= sprite_x) & (hcount < sprite_x + SPRITE_W) &
    (vcount >= sprite_y) & (vcount < sprite_y + SPRITE_H)
)
Excellent for testing movement, collision, and RGB blending.
🛠️ Recommendations
- Store
tilemapsin local BRAM to avoid Wishbone access delays. - For bulk transfers, use
LiteDRAMDMAReaderin burst mode. - Separate UART for console vs. bridge: use
uart_name="crossover"+add_uartbone().
🧪 Example Integration
self.videophy = VideoGowinHDMIPHY(platform.request("hdmi"), clock_domain="hdmi")
self.submodules.vtg = VideoTimingGenerator(default_video_timings="640x480@75Hz")

self.submodules.video_pattern = MovingSpritePattern(hres=640, vres=480)

self.comb += [
    self.vtg.source.connect(self.video_pattern.vtg_sink),
    self.video_pattern.source.connect(self.videophy.sink)
]
This shows how to integrate a custom video pattern into the HDMI pipeline.
📆 Auxiliary Files
logo.mem: contains sprite or tile RGB data.patterns.py: defines the rendering modules.
📊 Performance
The Tang Nano 9K can handle 640×480 at 75 Hz without issue. For higher resolutions:
- Optimize combinational logic.
- Simplify FSMs.
- Use HyperRAM and DMA for efficient memory access.
🧹 Resources and Links
📌 Conclusion
The Tang Nano 9K proves that even an affordable FPGA can render real-time HDMI graphics using custom logic. Thanks to LiteX, it’s possible to build flexible SoCs that integrate video, peripherals, and control logic in a single chip.
VideoPatternis a generic term. This article explores specific implementations likeTilemapRenderer,BarsRenderer, and others. ↩︎